Amazon PPC Reports Automator
Set up your Amazon PPC reports in a couple of clicks, and download almost 2 years of your ad data instead of 60 days.
Amazon’s new PPC reporting is powerful but confusing. This page lets you choose the report you want, where it’s emailed and how often, and then sets it all up for you.
Its biggest benefit is that, if you know how, you can download your ad data for almost 2 years. We do know how, and we’ve built it in. A couple of clicks per report gets you that historical data. Goodbye, 60-day limits!
The form below makes a bookmarklet: a bookmark that runs a small program instead of opening a web page. Drag it to your bookmarks bar. Then, on the Reporting page of your Amazon Ads account, click it. It picks the columns, names the report, adds your email address and sets the date range and schedule, so you don’t have to.
Build a custom bookmarklet:
1. Pick one report (each report gets its own bookmarklet):
2. Delivery email:
3. Date range and frequency:
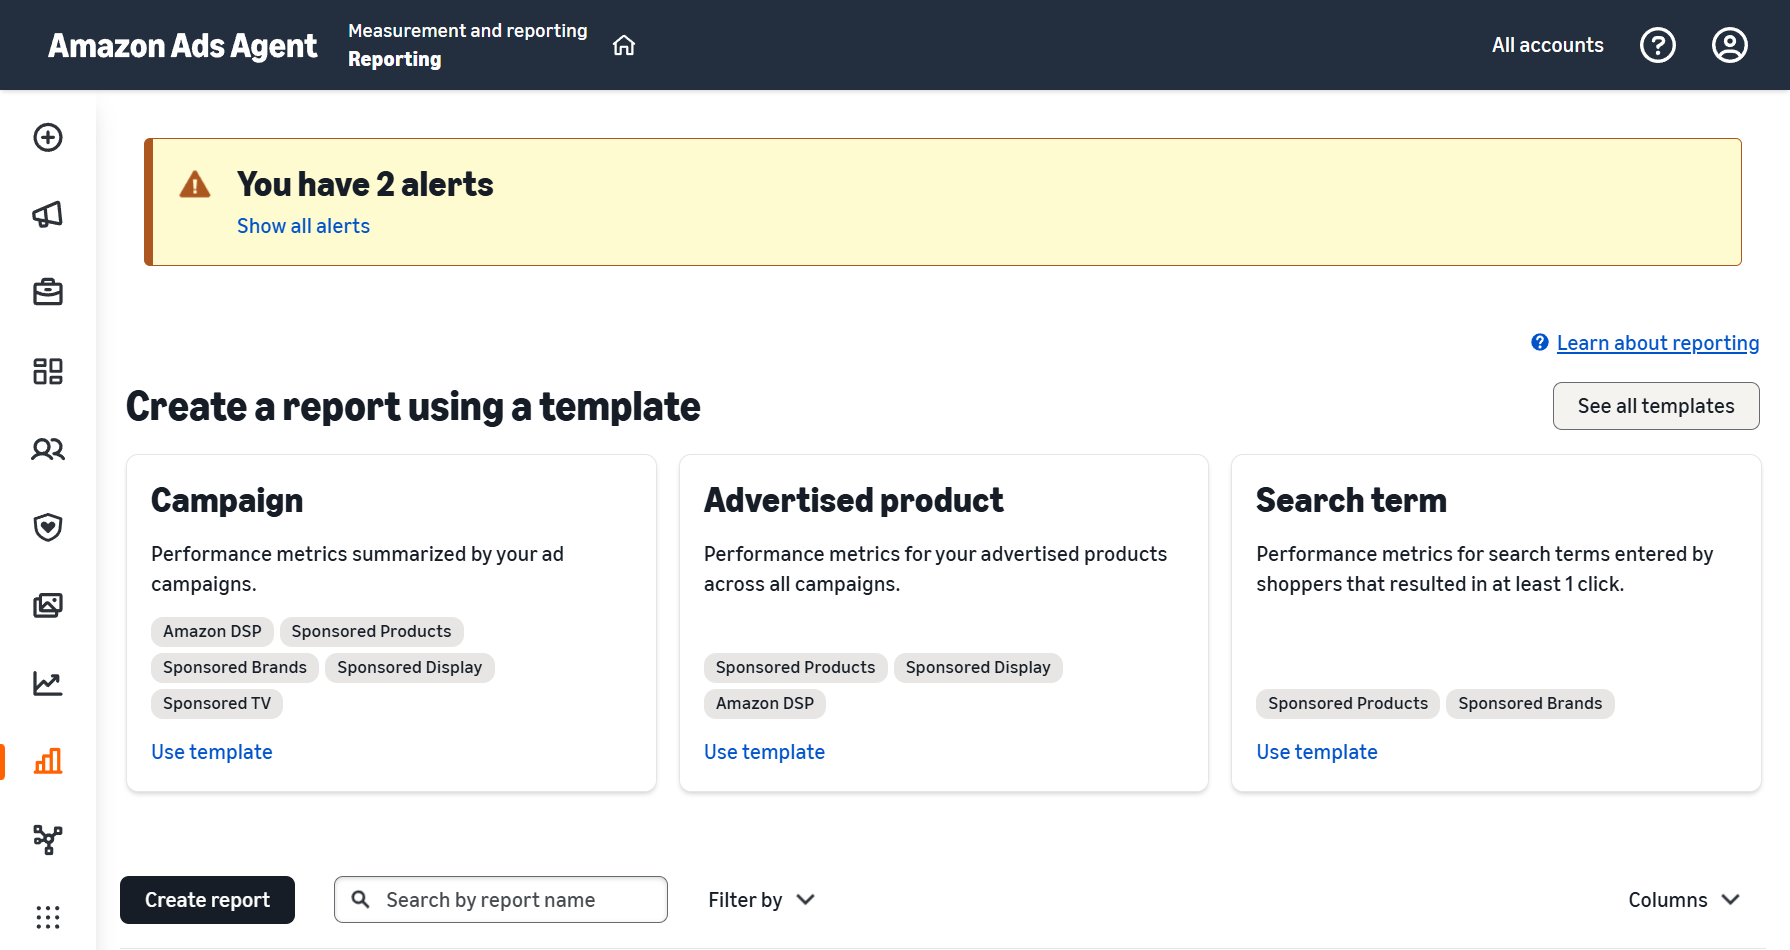
How to get to the report page
Follow these steps in Amazon Ads. Run the bookmarklet on the last page.
1. Open the Reporting page
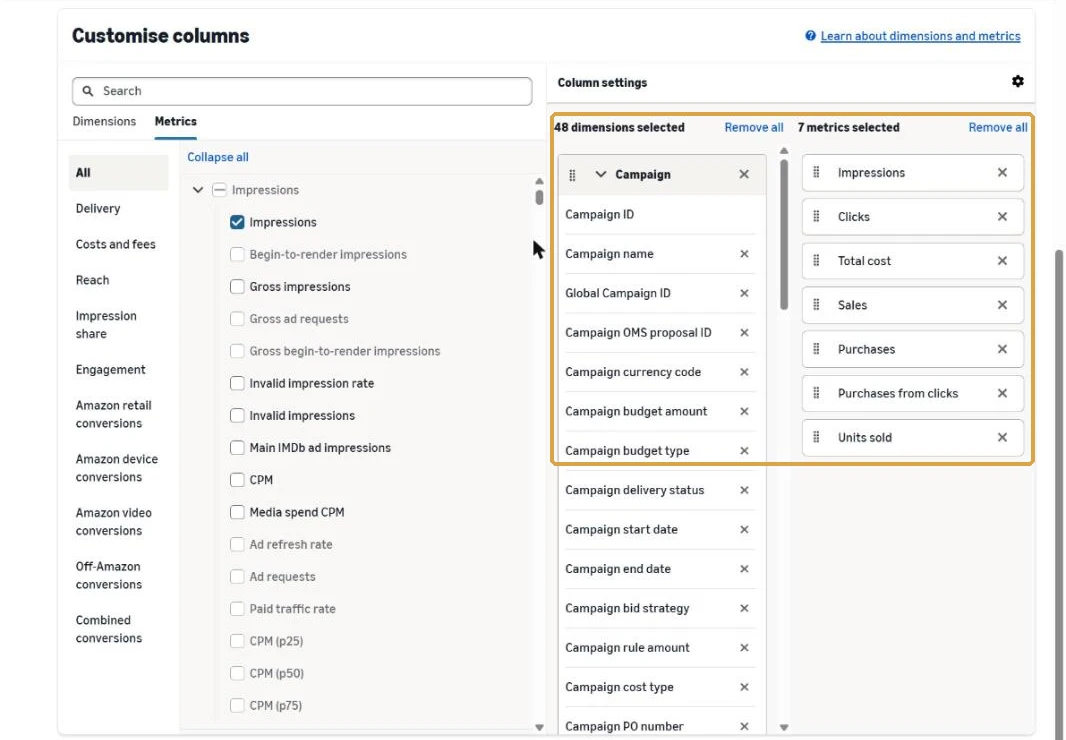
Click the bar chart icon in the left menu. This is “Measurement and reporting”. Then click Reporting.
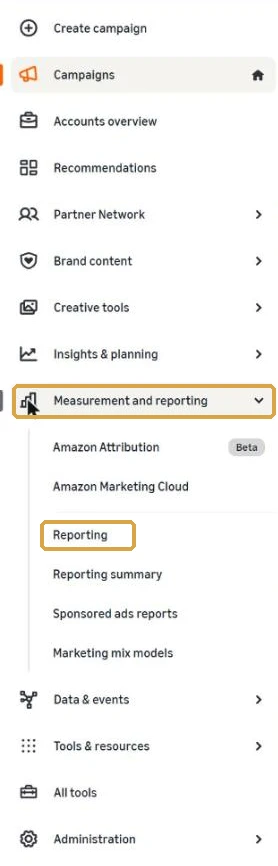
2. Click Create report
On the Reporting page, click the dark Create report button above the list of reports.
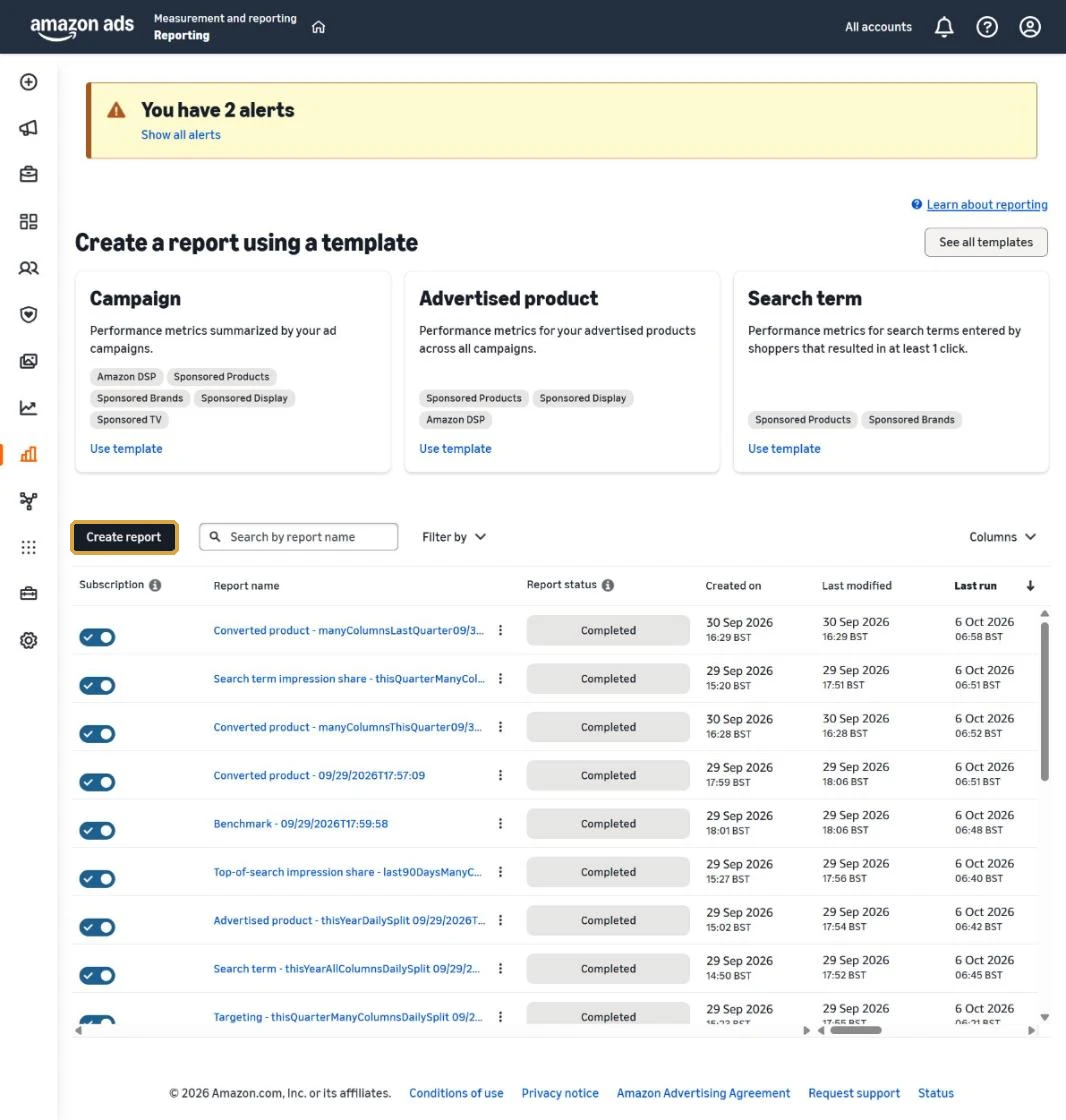
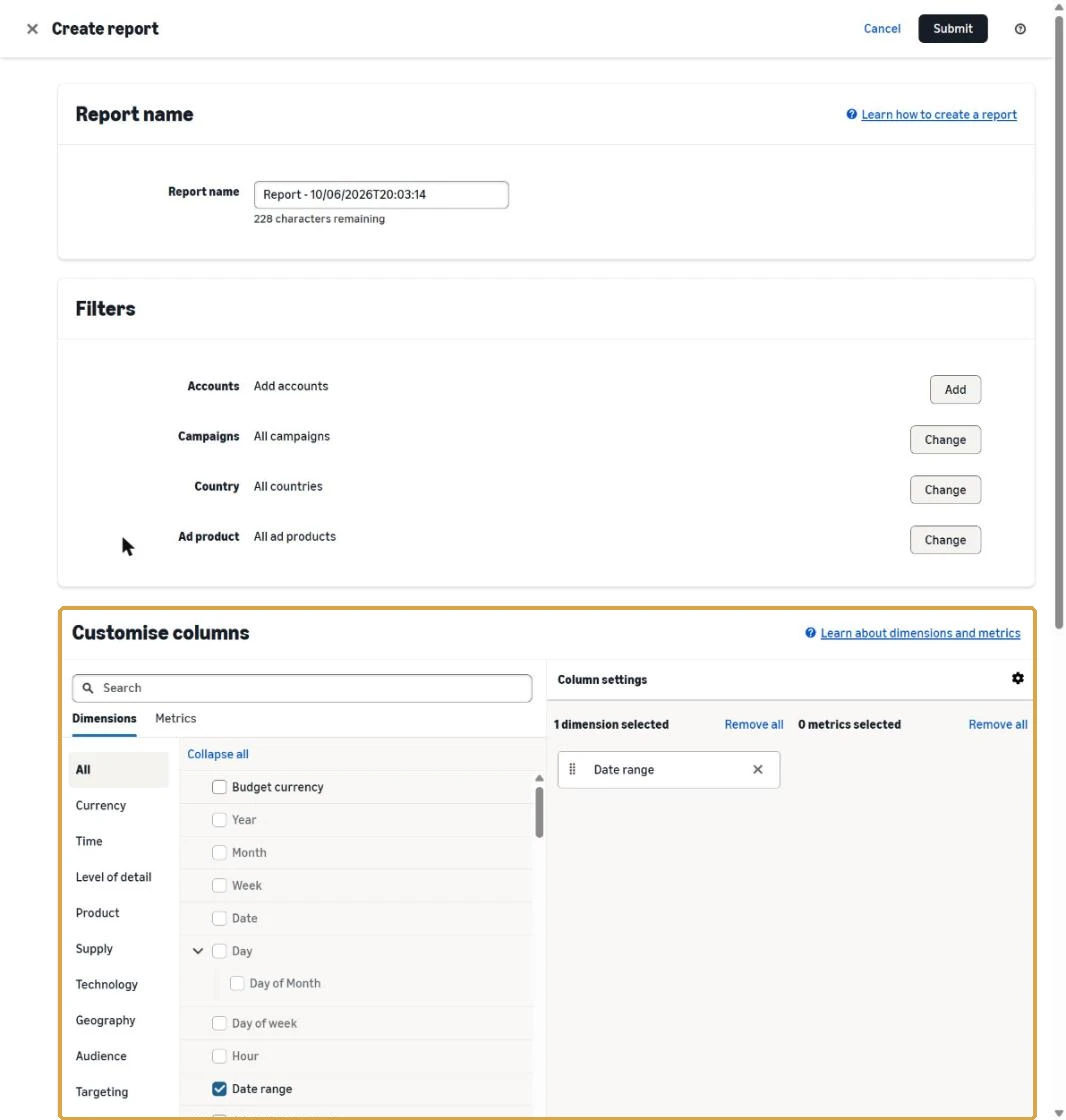
3. Open the Customise columns box
The Create report page opens. Scroll down to Customise columns.
4. Click your bookmark
Click the bookmark you made at the top of this page. It works on the Reporting page and on the Create report page. On the Reporting page it clicks Create report for you. It then names the report, ticks the columns, adds your email, and sets the date range and how often the report runs. Do not click anything until the box in step 5 appears.
5. Read the result
A box says how many columns the bookmarklet ticked and what date range it set. Click OK.
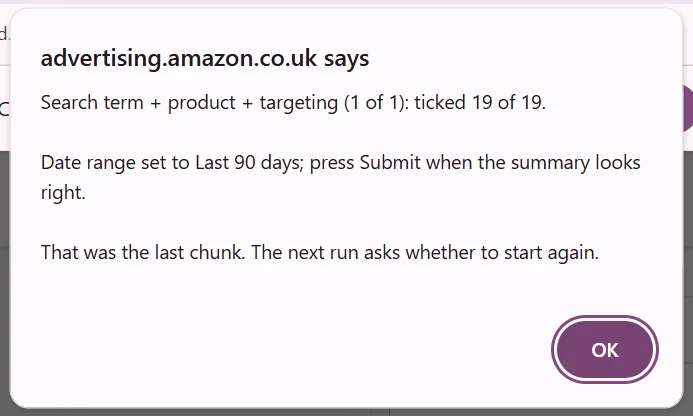
If the box lists columns as missing, tick those columns by hand. If the box lists a setting it could not make, set it by hand.
6. Check the ticked columns
The Column settings box on the right lists every dimension and metric the bookmarklet ticked. The number of each shows at the top. Check the list, then click Submit.